Want a creative hobby that actually sticks? You’re in the right place — and yes, you can totally nail these.
These ideas unlock quick wins, satisfying textures, and cute gift-worthy stuff you can whip up this weekend.
Ready to dive into polymer clay magic that sparks joy and compliments galore? Let’s go, one fantastic idea at a time.
1. Layer Textures Like a Pro
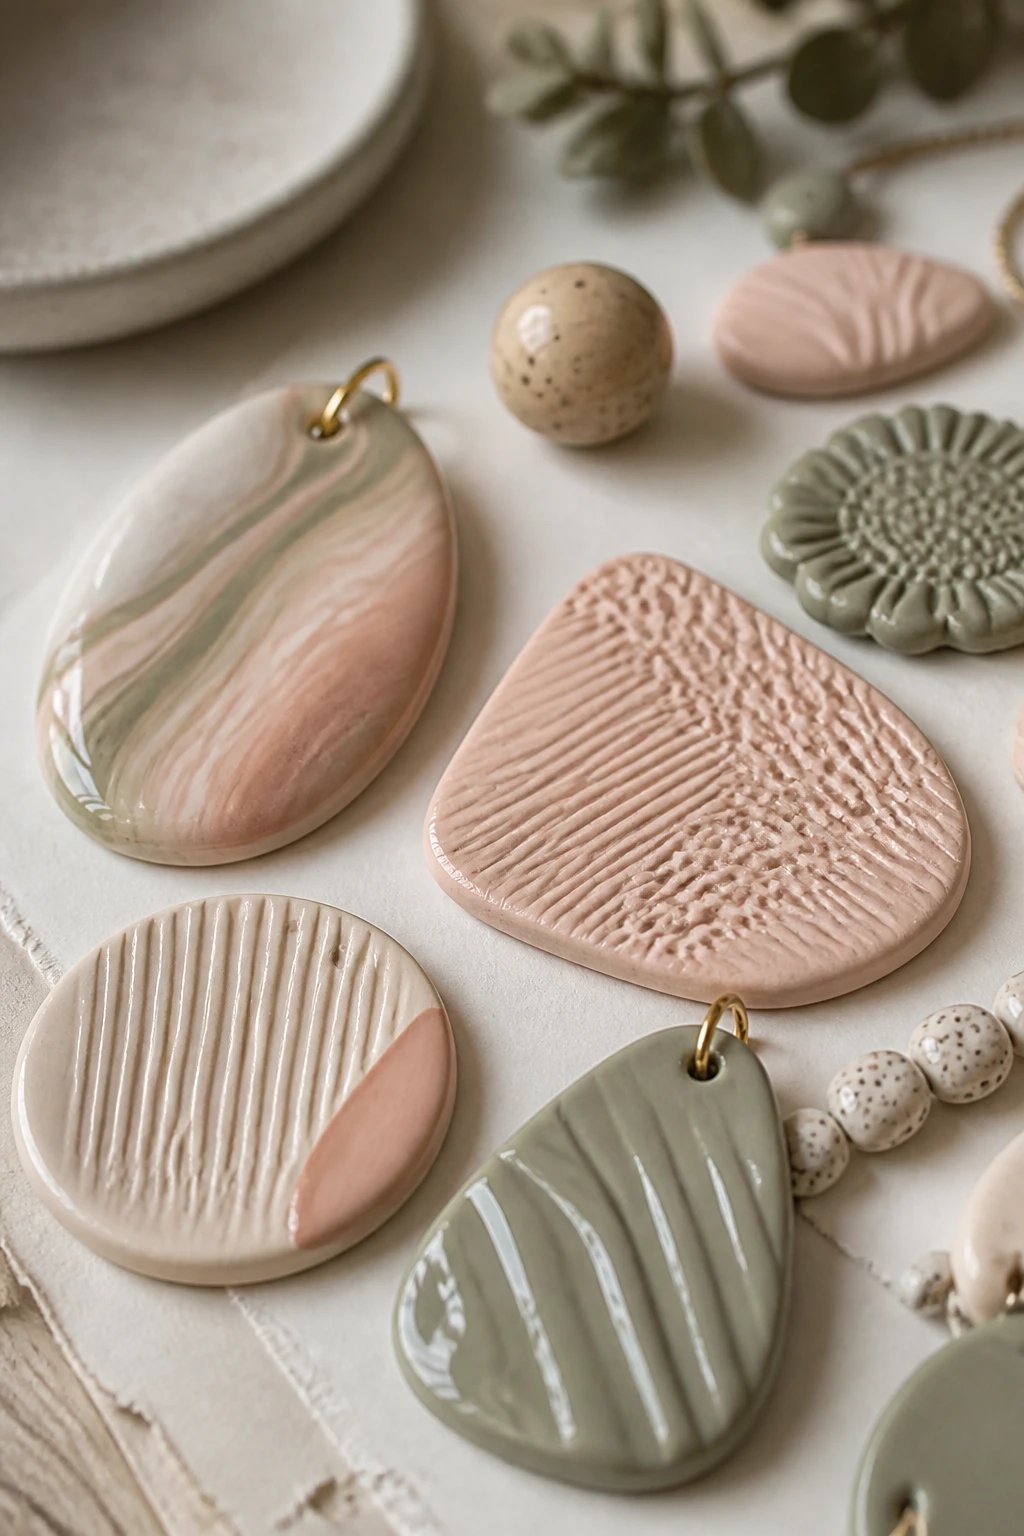
Texture is everything when you want your pieces to pop. A mix of smooth, speckled, and marbled surfaces creates depth that photos love.
Start with a simple polymer clay base and add texture through rolling patterns, carving, or using textured stamps. The payoff is chef’s-kiss level polish.
Key Points
- Choose a color family and stick to it for cohesion
- Use a soft brush or fork to create subtle textures
- Finish with a light gloss for shine or matte for chic minimalism
When you layer textures thoughtfully, even tiny trinkets feel premium and Instagram-worthy.
2. Miniature Food That Looks Real (But Not Quite)

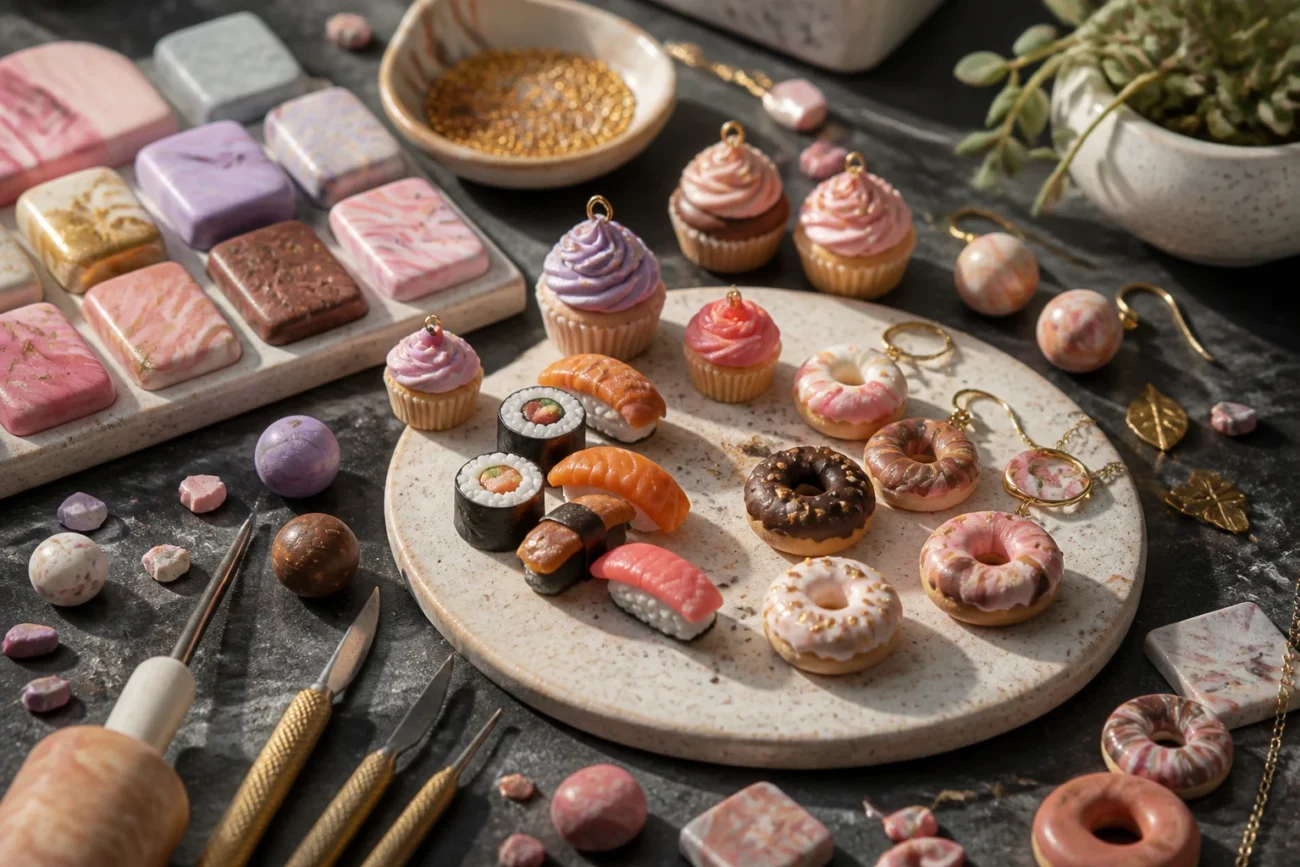
Who can resist tiny donuts, sushi, or cupcakes? Build bite sized clay morsels that fool the eye without losing their charm.
Focus on proportion and color balance to keep things adorable rather than spooky realistic. FYI, tiny sprinkles are everything.
Tips
- Use translucent clay for glaze highlights
- Add a few metallic accents for a playful twist
- Seal with a clear glaze to preserve color
These mini treats make adorable pins, keychains, or charms for a bracelet.
3. Geometric Coasters That Spark Joy
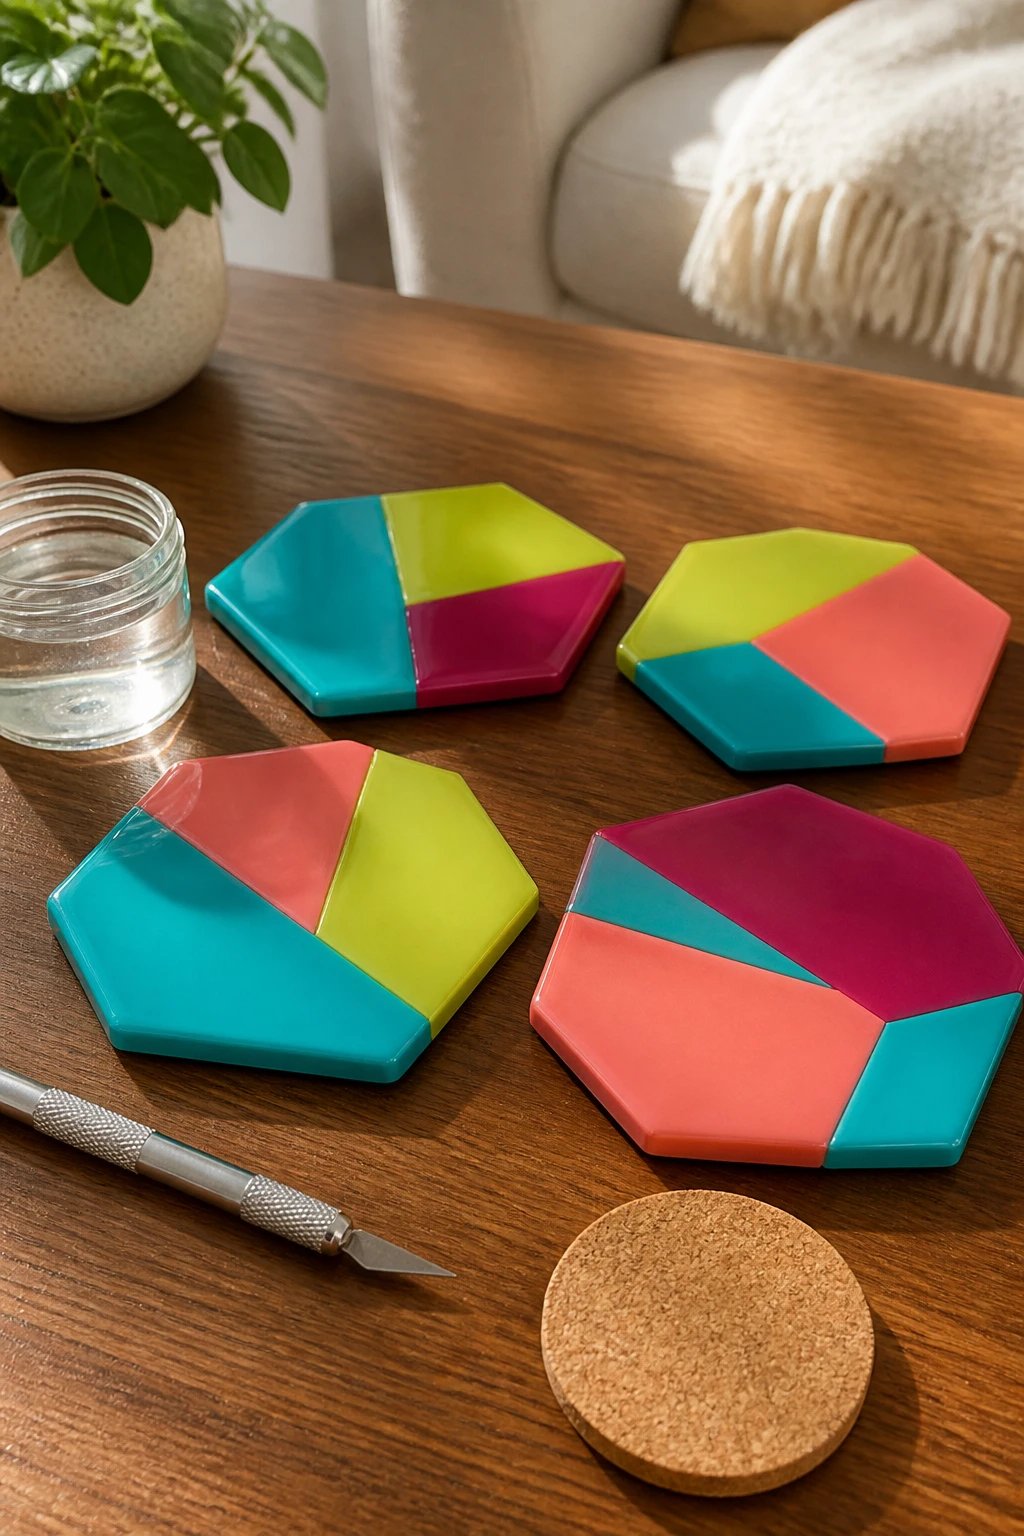
Coasters that double as art? Yes please. Polymer clay lets you craft bold shapes and color combos that shout modern chic.
Keep edges clean with a sharp blade and sand before sealing. Your coffee will actually look good on these.
Materials
- Bright acrylic colors
- Clear resin or protective sealant
- Coaster bases or cork circles
End result: conversation starters that are practical and pretty.
4. Resin-Ready Charms with Polymer Clay Spin

Combine clay with resin to create chunky, glassy charms that shimmer in light. The cross between textures is addicting.
Pick simple shapes first to get the hang of balancing depth and color saturation.
Key Points
- Bake clay separately before resin assembly
- Embed tiny beads for sparkle
- Seal edges to prevent resin seepage
Wear them on a necklace, add to a bag, or gift to a friend who loves shiny things.
5. Botanical Earrings That Bend the Rules
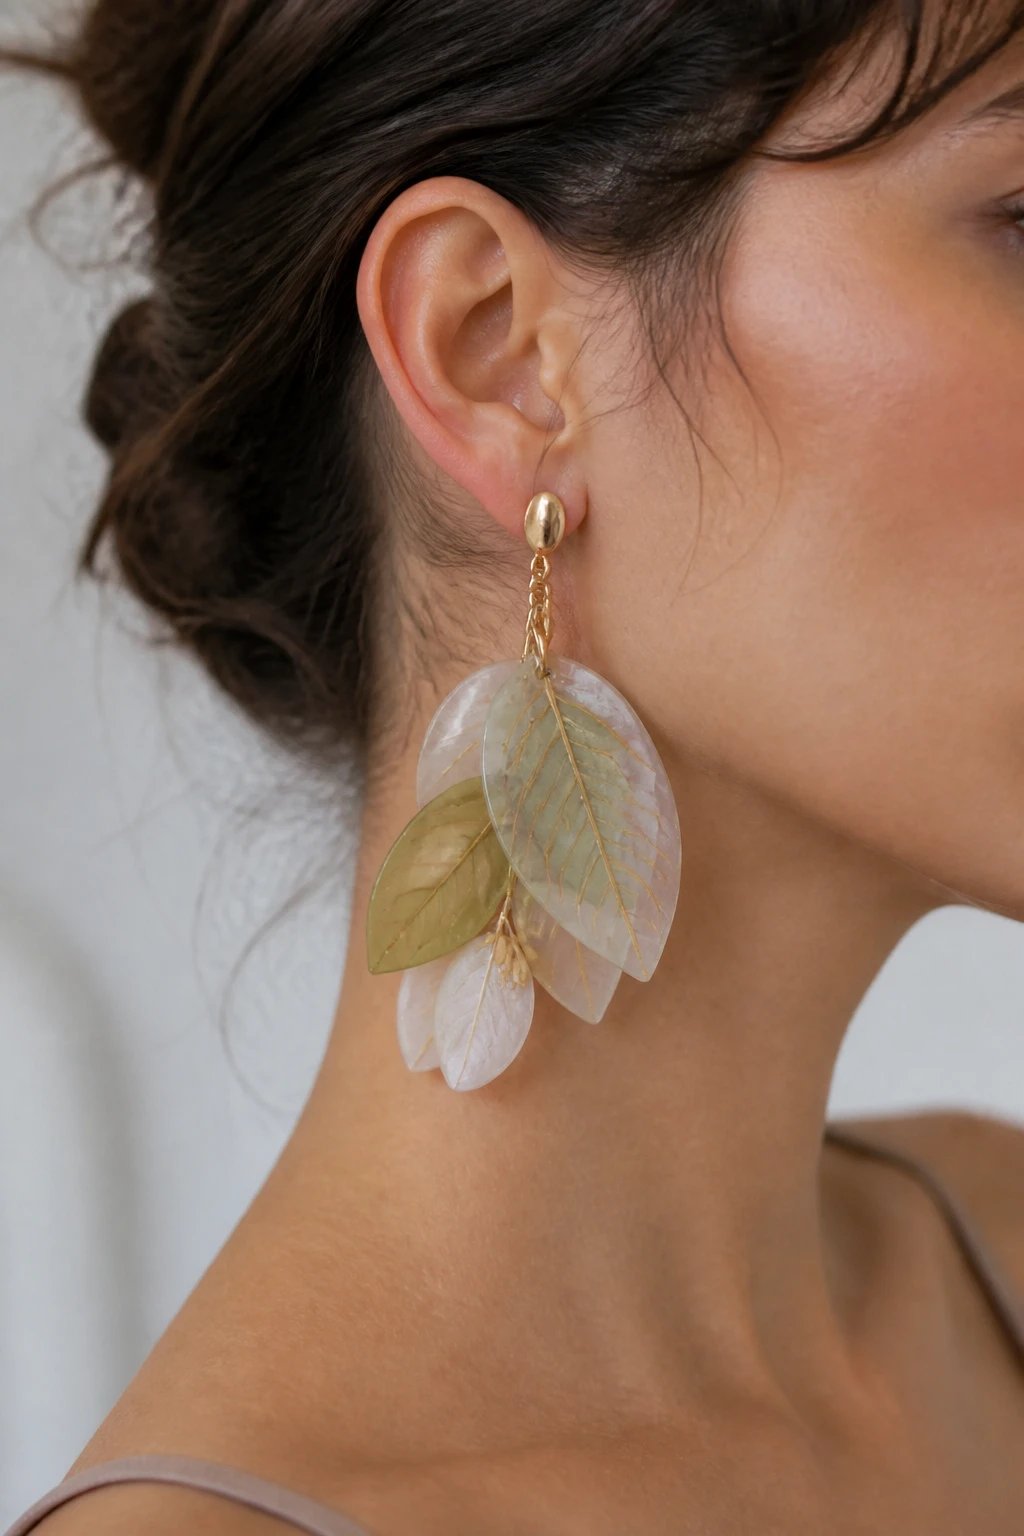
Leafy veins, petals, and abstract botanicals translate beautifully in polymer clay. Lightweight, eye catching, and totally wearable.
Play with translucency for a soft, natural vibe. Seriously, these feel like a tiny bit of nature in your ears.
Tips
- Use leaf templates for consistent shapes
- Mix matte and gloss finishes for depth
- Pair with metallic findings for contrast
Gorgeous accessories that pair with all outfits and photos.
6. Marbled Phone Charms for On-the-Go Glam
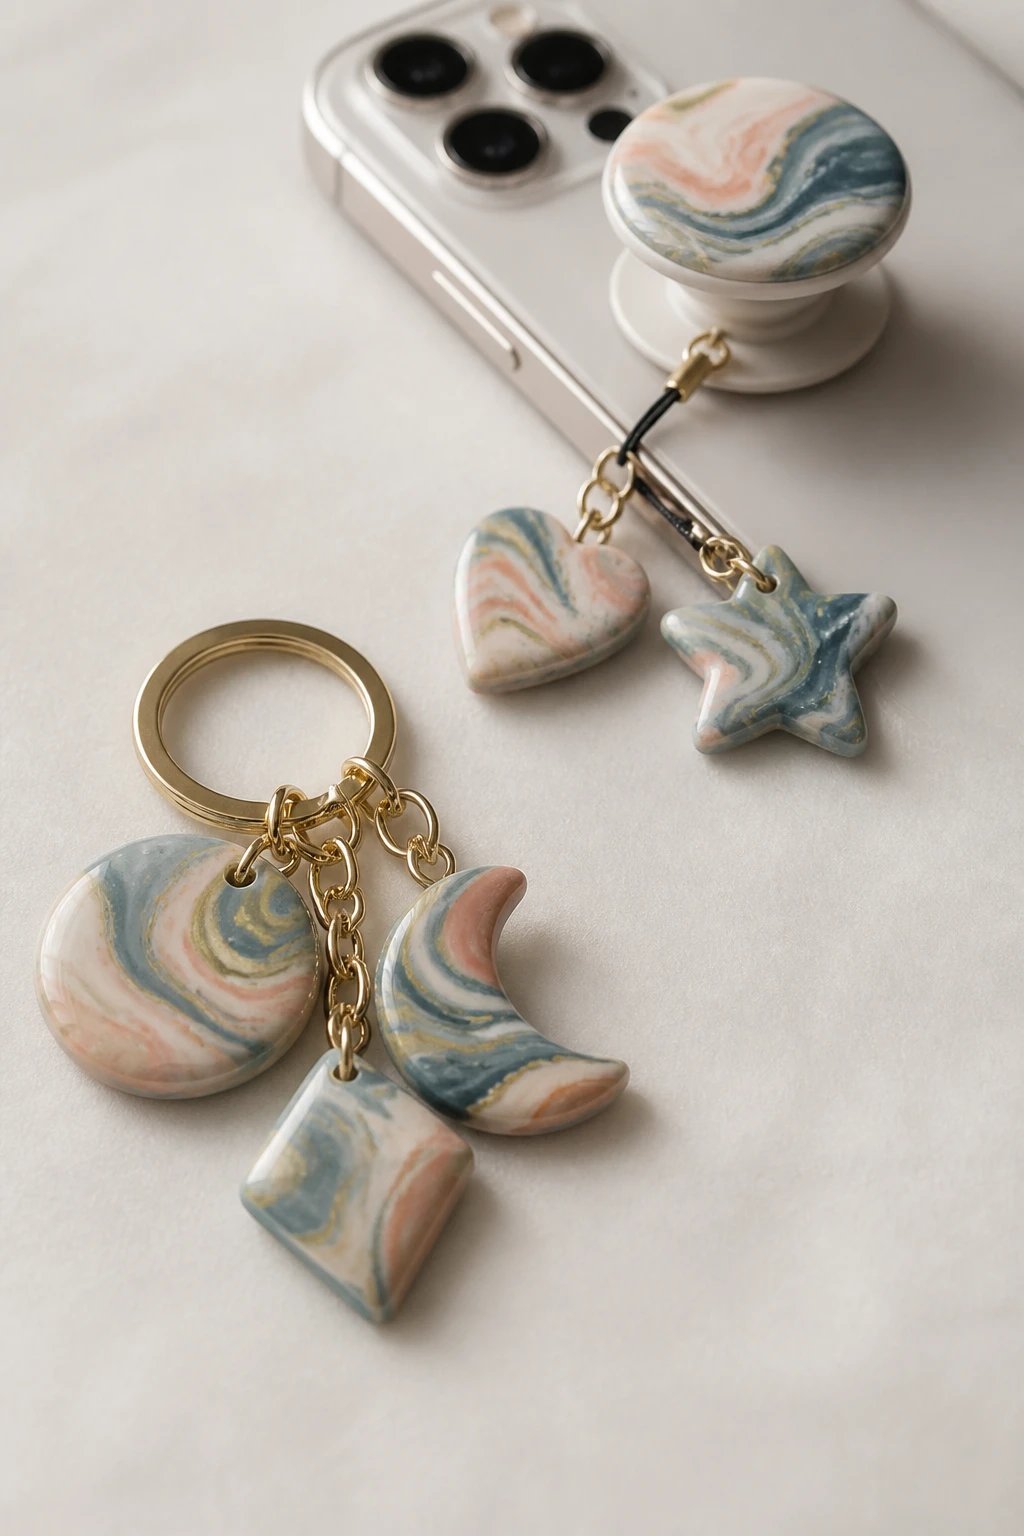
A marbled effect never goes out of style. Create swirling colors that look like a tiny painting you can carry in your pocket.
Use a simple cane technique to achieve clean, dramatic swirls that photograph beautifully.
Why It Works
- Versatile as bag charms or phone grips
- Colorway can match any season or mood
- Quick bake times keep the vibe fast and fun
Trust me, your phone will get compliments at every coffee shop.
7. Neon Accent Badges for Your World
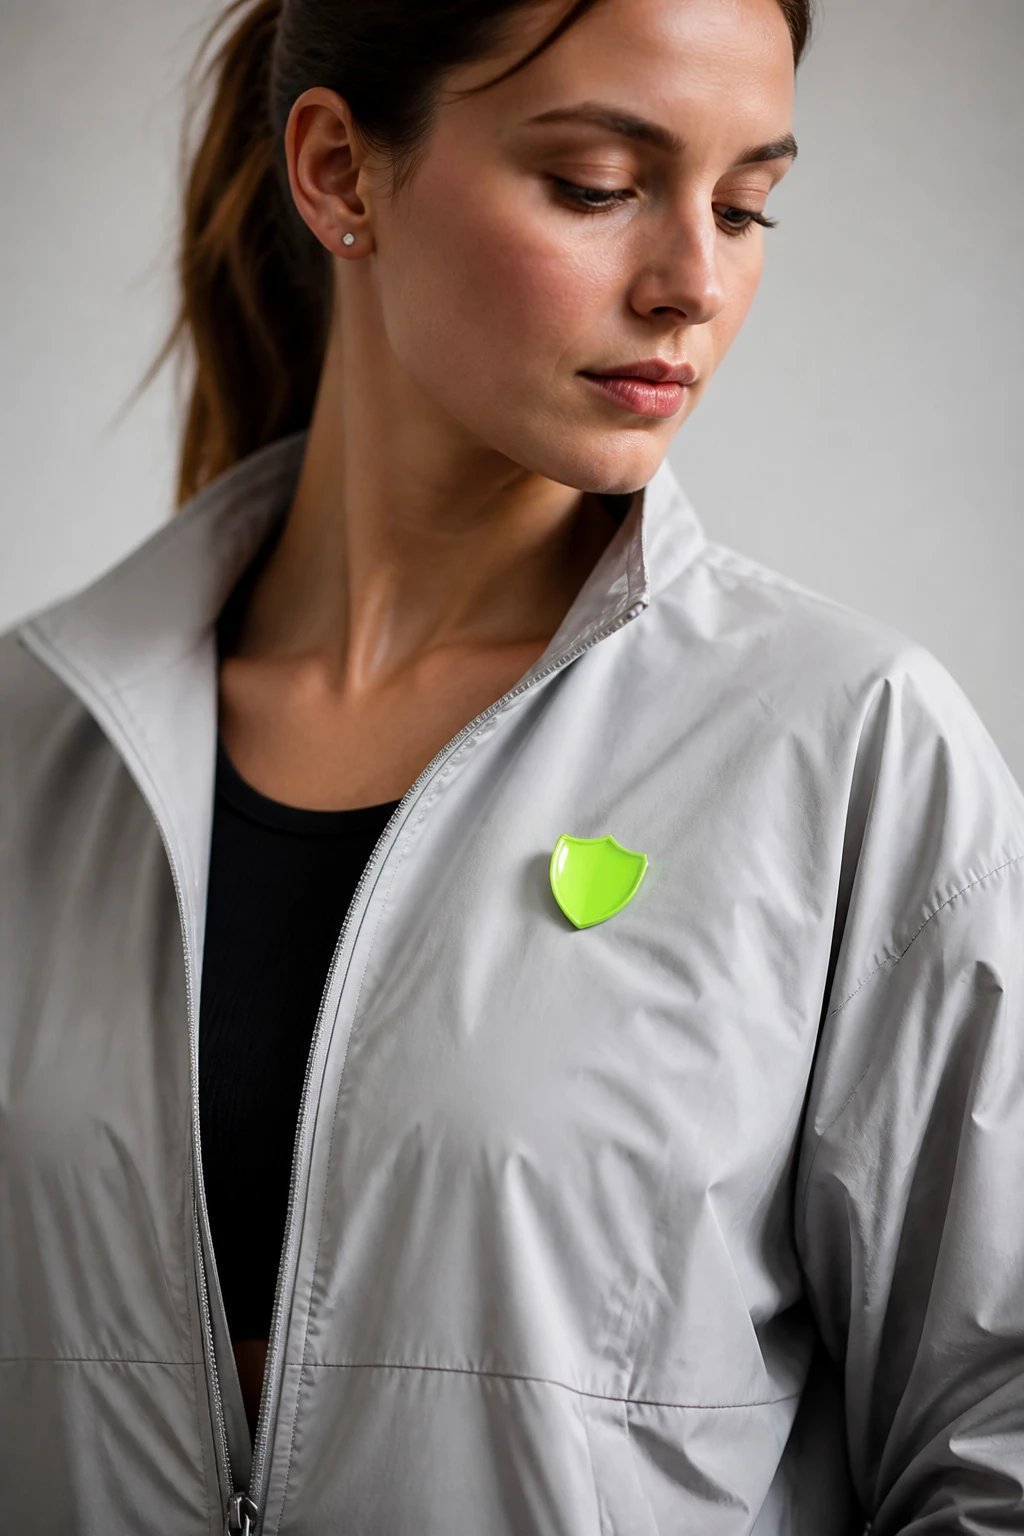
Bold pops of neon in small badges or pins instantly elevate plain outfits or bags. Go loud or go home.
Choose one neon color and keep surrounding tones subdued for maximum impact.
How-To
- Create round or shield shapes for a classic badge look
- Finish with a high gloss to imitate enamel
- Adhere to magnetic backs for easy swapping
Fun, sporty, and totally Pinterestable.
8. Faux Stones That Look Real in a Minute
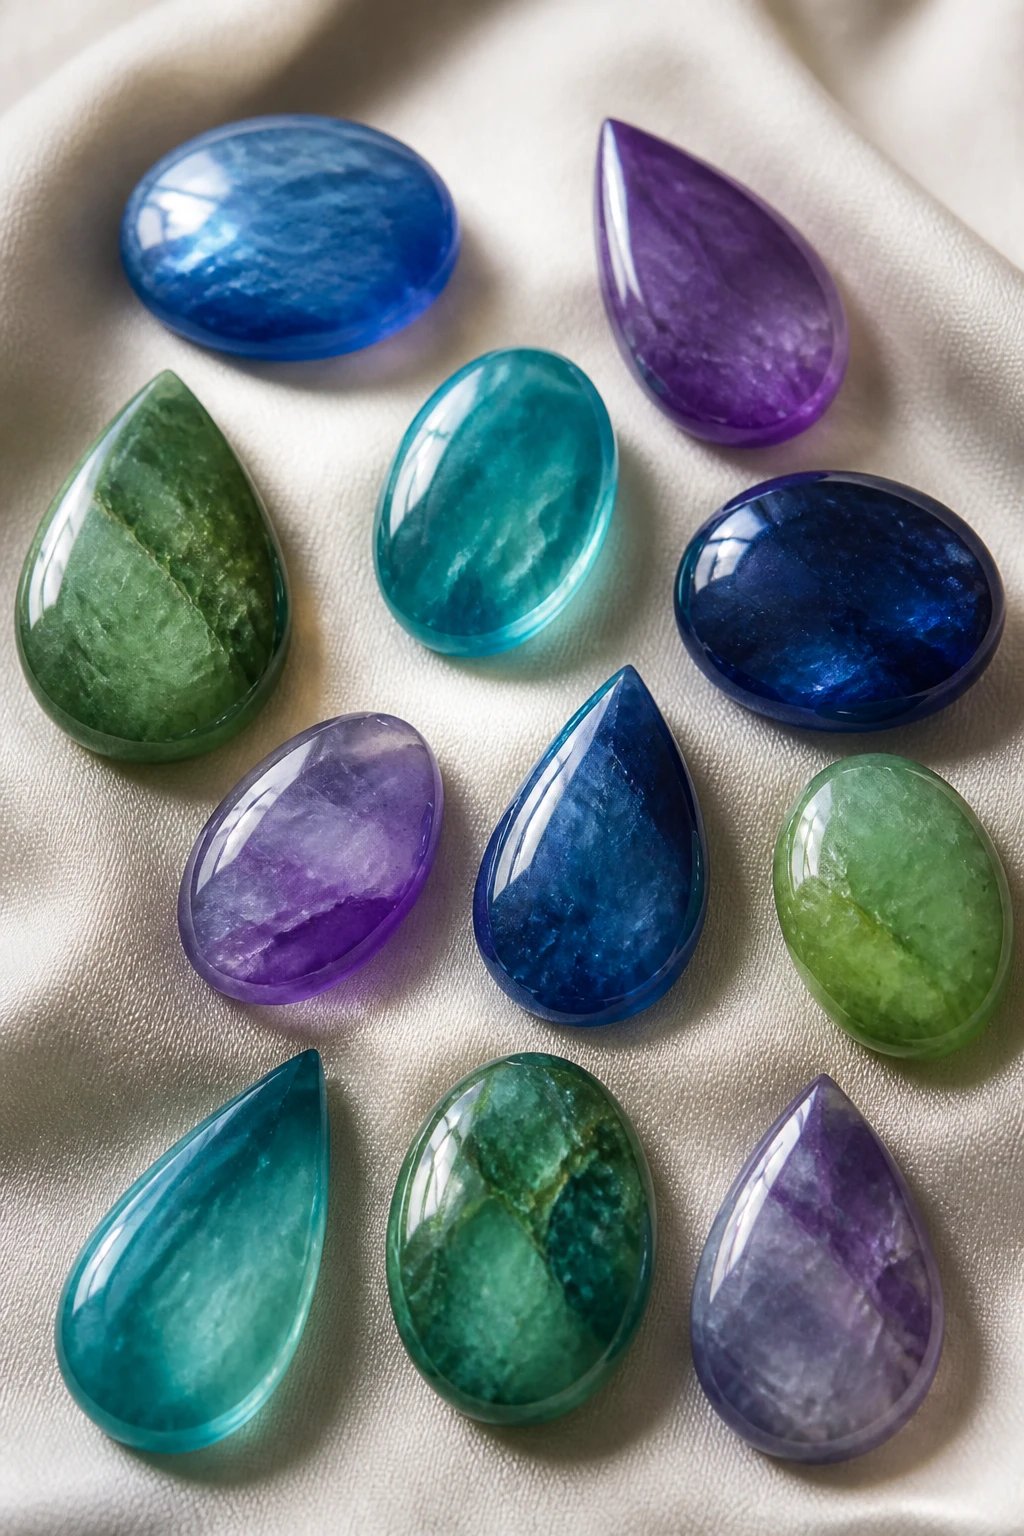
Gemstone vibes without the heavy price tag or weight. Clay stones are incredibly convincing with the right gloss and shading.
Layer translucent colors, then add a tiny highlight to sell the stone effect.
Materials
- Translucent and opaque clays
- Gloss glaze or resin coating
- Shape cutters for consistency
Perfect for earrings, pendants, or decorative magnets.
9. Textured Bead Chains That Feel Ancient
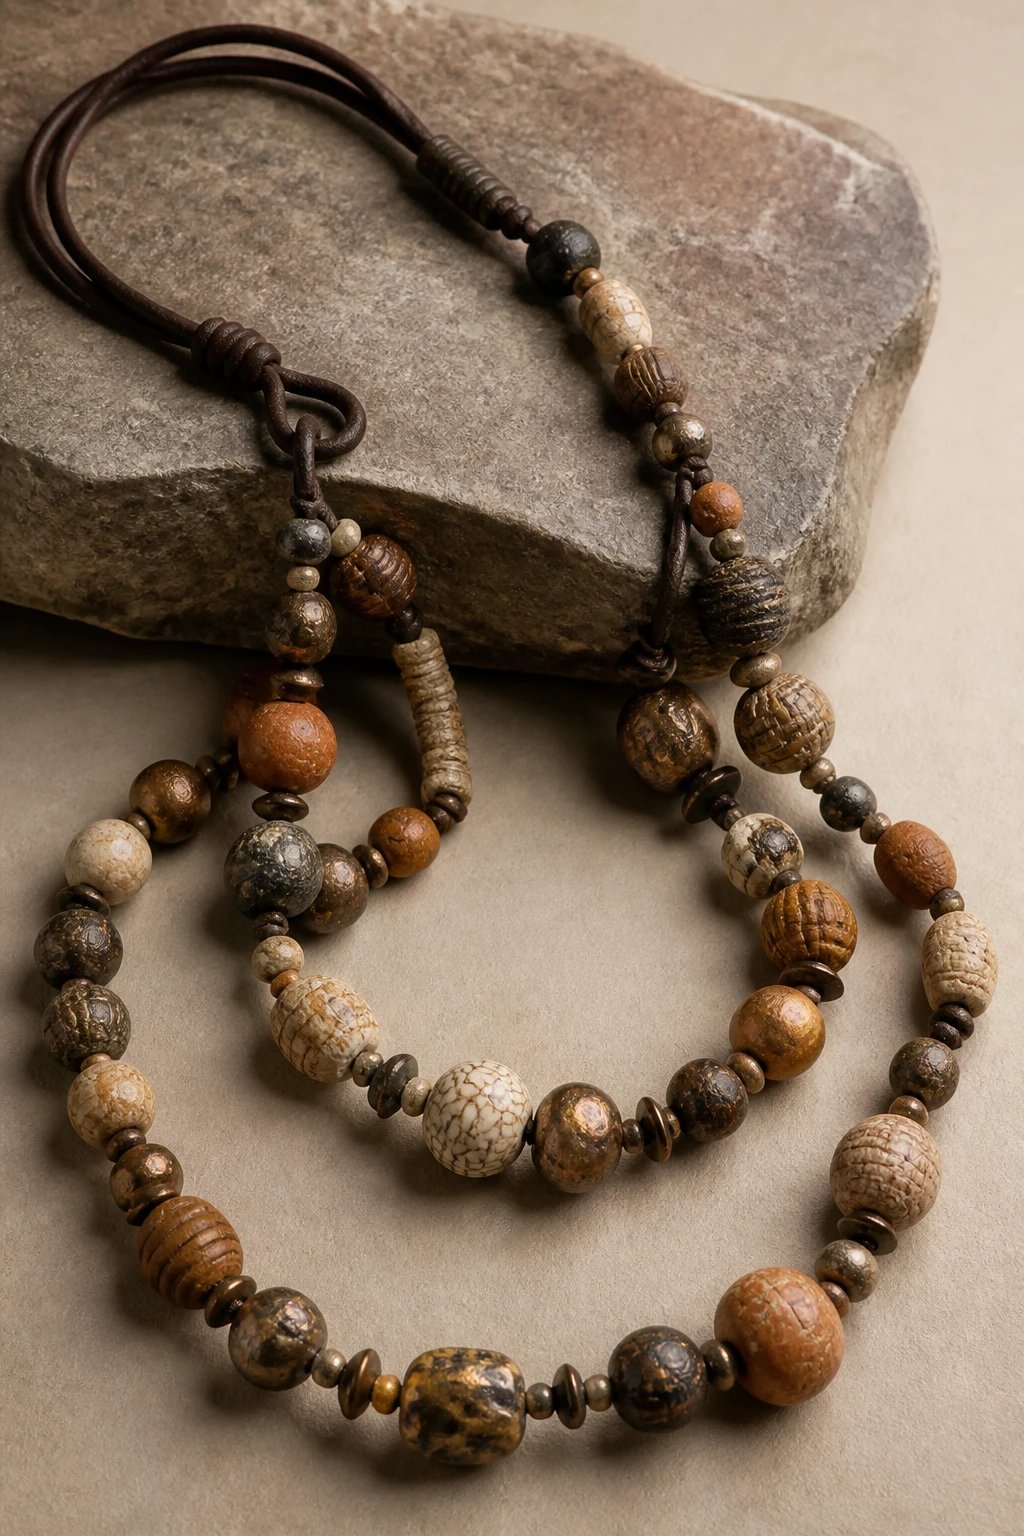
Channel a tactile, handmade look with textured beads strung into playful chains. It’s bold, it’s chic, it’s you.
Vary bead sizes to create rhythm and movement with every turn.
Notes
- Use different textures per bead
- Combine with leather or cord for a chunky vibe
- Seal well to prevent color bleeding
Accessorize with a statement feel that remains lightweight.
10. Cute Animal Molds for Kids and Kids-At-Heart
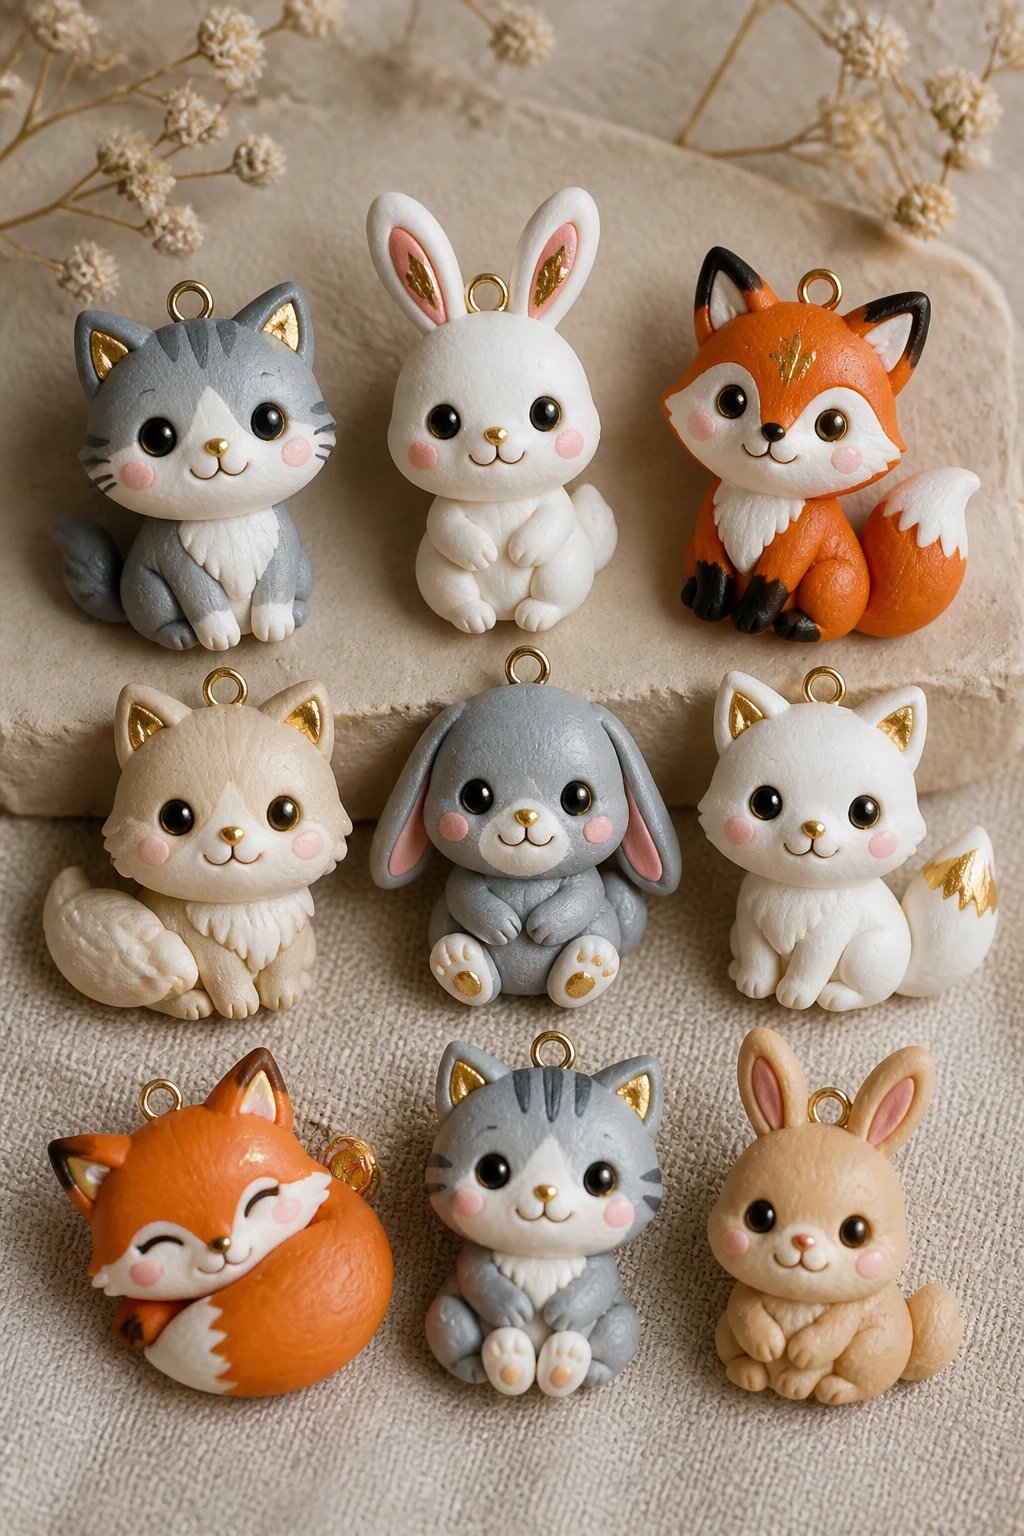
Animals are endlessly lovable in clay. Create tiny cats, rabbits, or foxes with playful expressions.
Focus on features like ears and eyes to keep them expressive even at small sizes.
Tips
- Soft shading adds life to faces
- Small loops at the top for easy hanging of ornaments
- Mix in metallic accents for whimsy
These make adorable charms, keychains, or shelf buddies.
11. Sparkle Studs That Don’t Hurt Your Ears
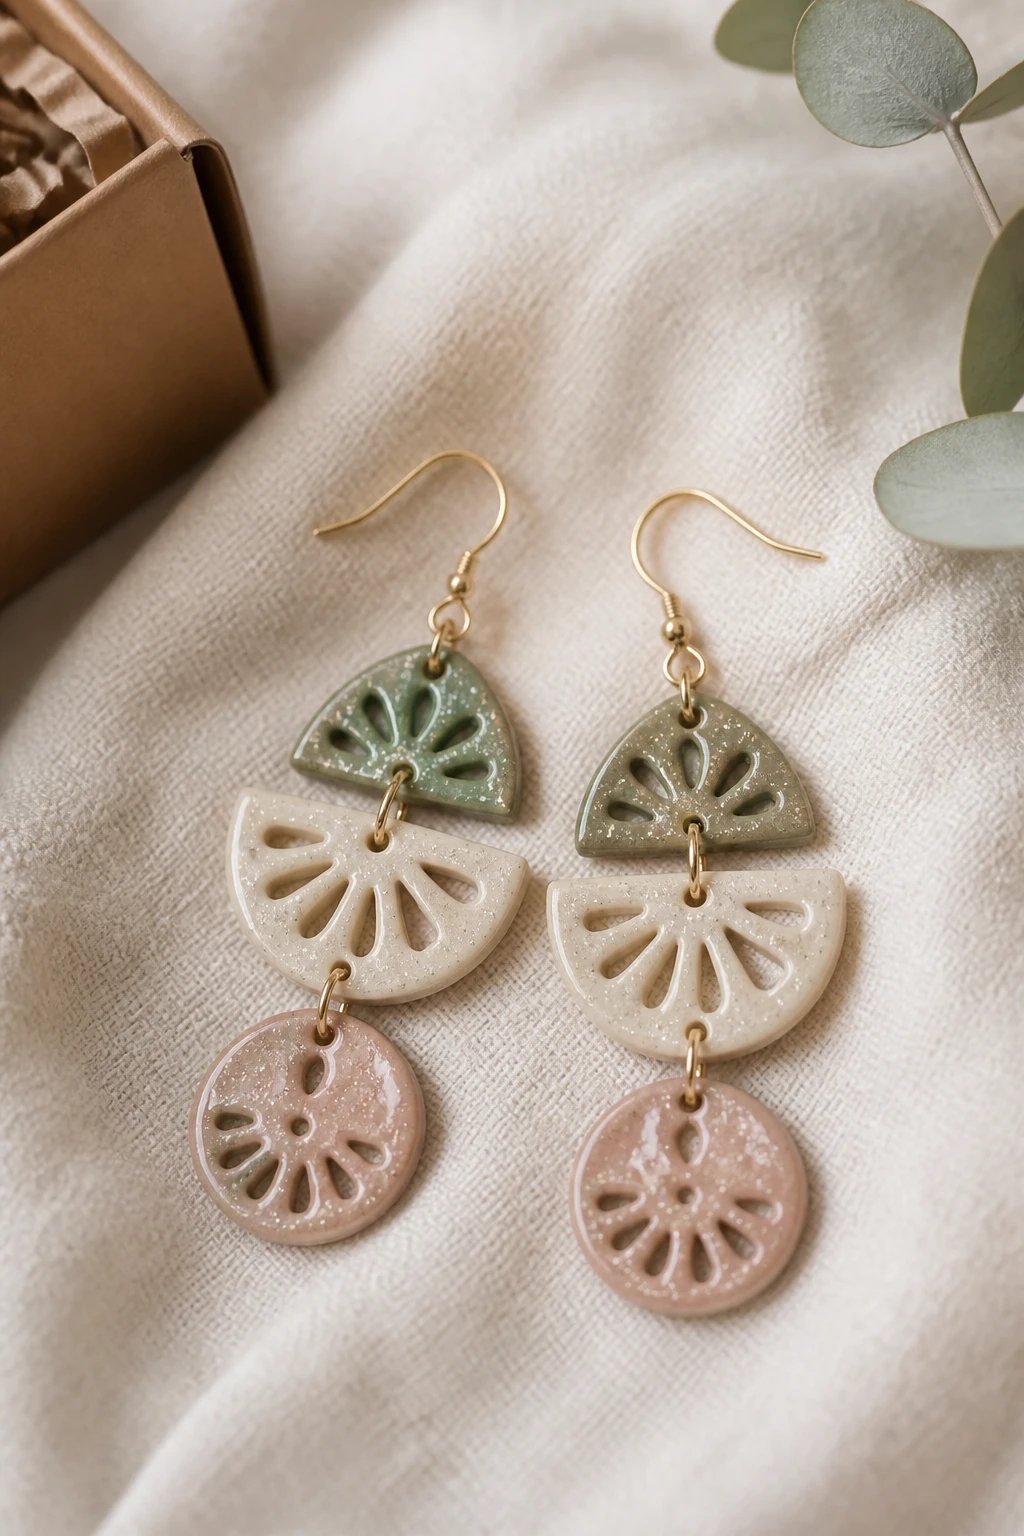
Shiny without being heavy, polymer clay earrings can be super chic when you nail balance and layering.
Try flat geometric shapes mixed with tiny filigree cutouts for light, wearable art.
What to Watch
- Use surgical steel posts for comfort
- Avoid heavy glazes that weigh down clay
- Compostable packaging for gifting sweetness
Instantly upgrade any outfit with a bit of glam.
12. Coiled Vessels for Desk Cams and Trinkets
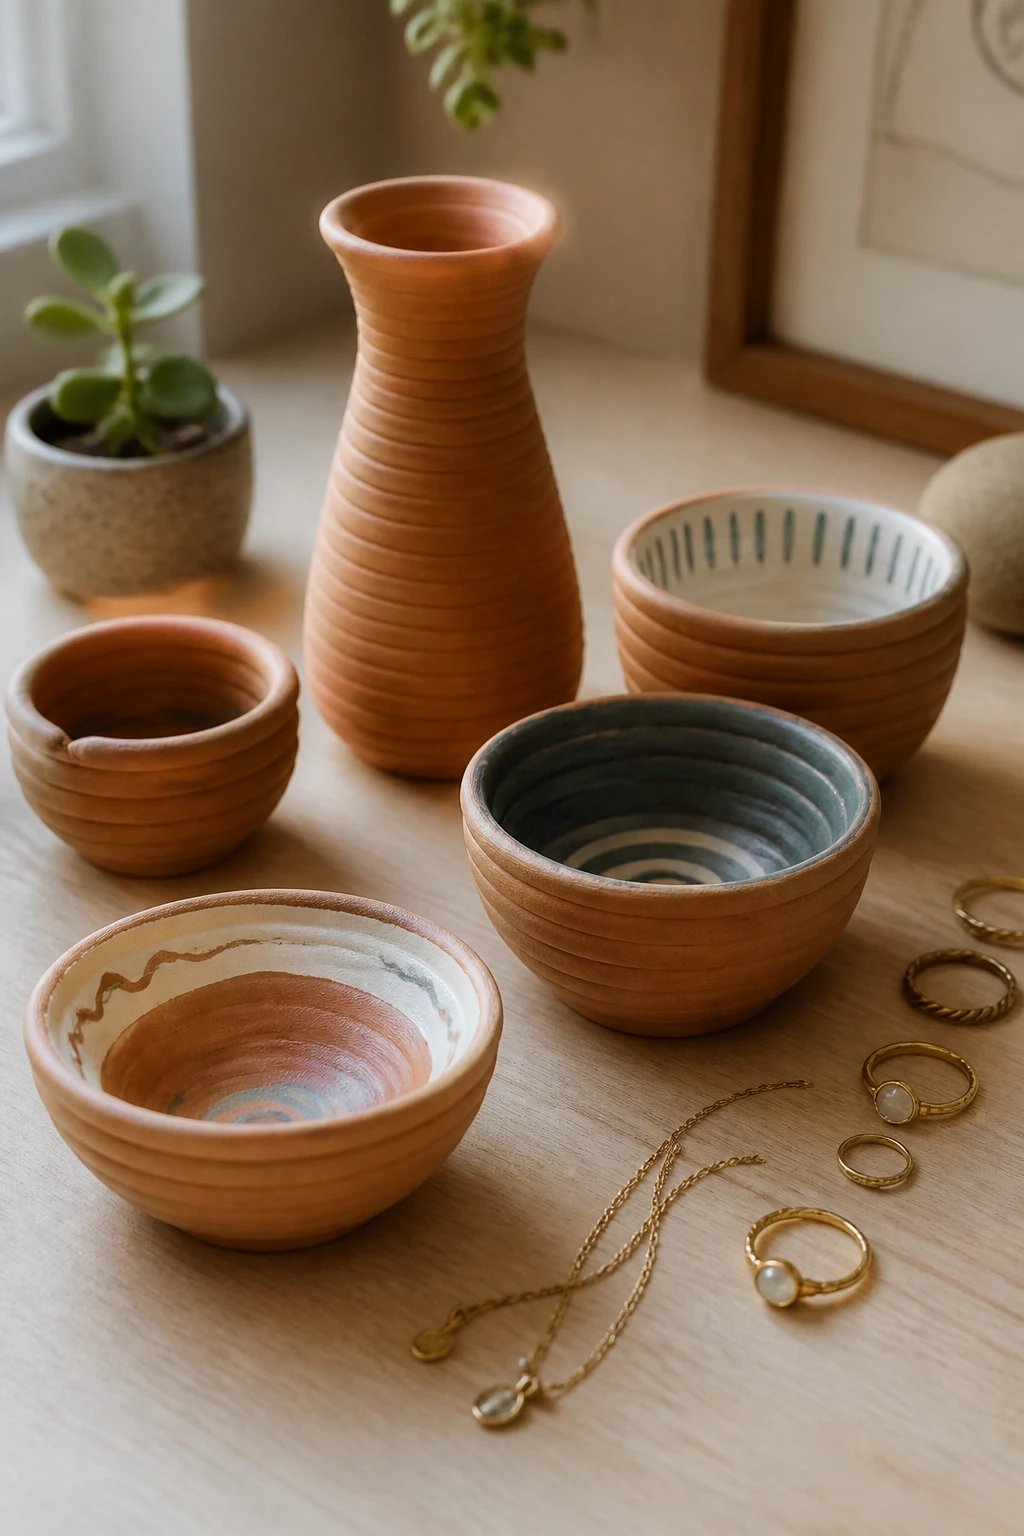
Coiled clay bowls or tiny vases bring a sculptural vibe to your desk. They’re practical and pretty all at once.
Play with mouth sizes and edge finishes to get a refined artisan look.
Quick Tips
- Keep walls uniform for a polished finish
- Line with a clear sealant to repel moisture
- Use acrylic paints to add subtle patterns inside
Great for jewelry storage, ring bowls, or plant minis.
13. Faceted Pendants That Catch the Light
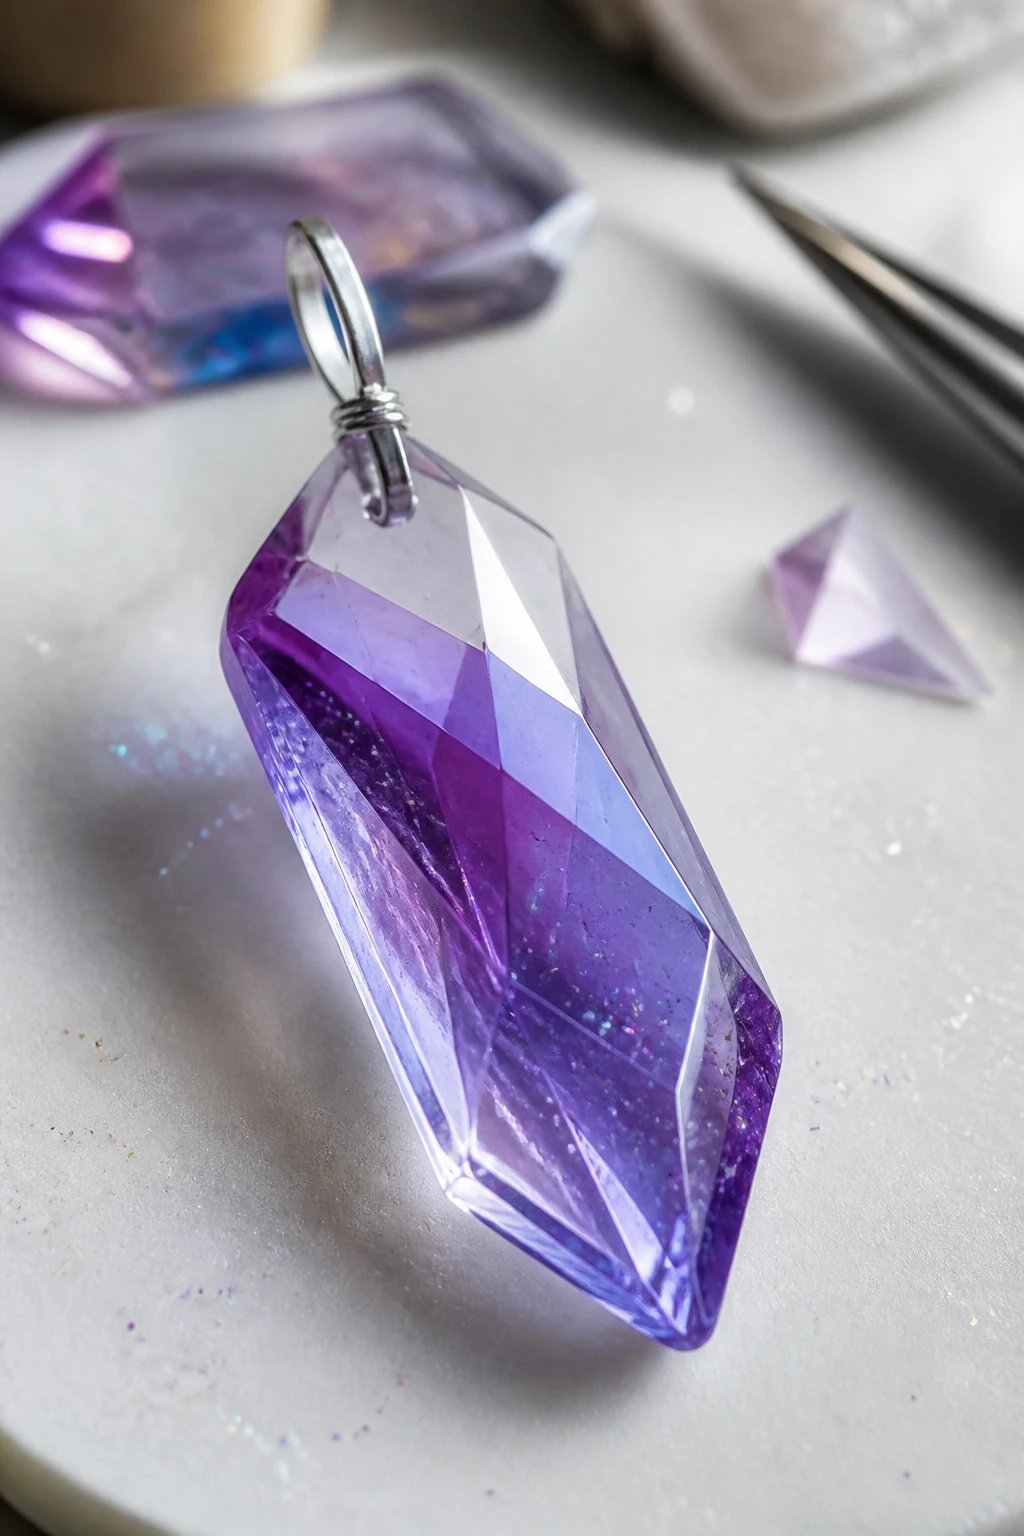
Faceted cuts mimic crystals in clay, catching light from every angle. The result is sleek and luxe.
Use a sharp blade and varying thickness to create crisp edges that glow.
Materials
- Clear or color tinted clays
- Jump rings and sturdy wire for hangers
- Optional glitter dust inside the layers for extra sparkle
Wear them or gift them with a smile and a wink.
14. Plaid and Patterned Sheets for Bold Statements

Why settle for plain when you can layer patterns like a pro? Plaids, florals, and checks look gorgeous in clay once you master the layering.
Use a gradient of tones to keep the pattern cohesive and not chaotic.
How-To
- Slice thin sheets and stack strategically
- Roll lightly to blend edges
- Seal for a durable surface
Ideal for statement bracelets or decorative magnets.
15. Tiny Garden Ornaments You Can Carry
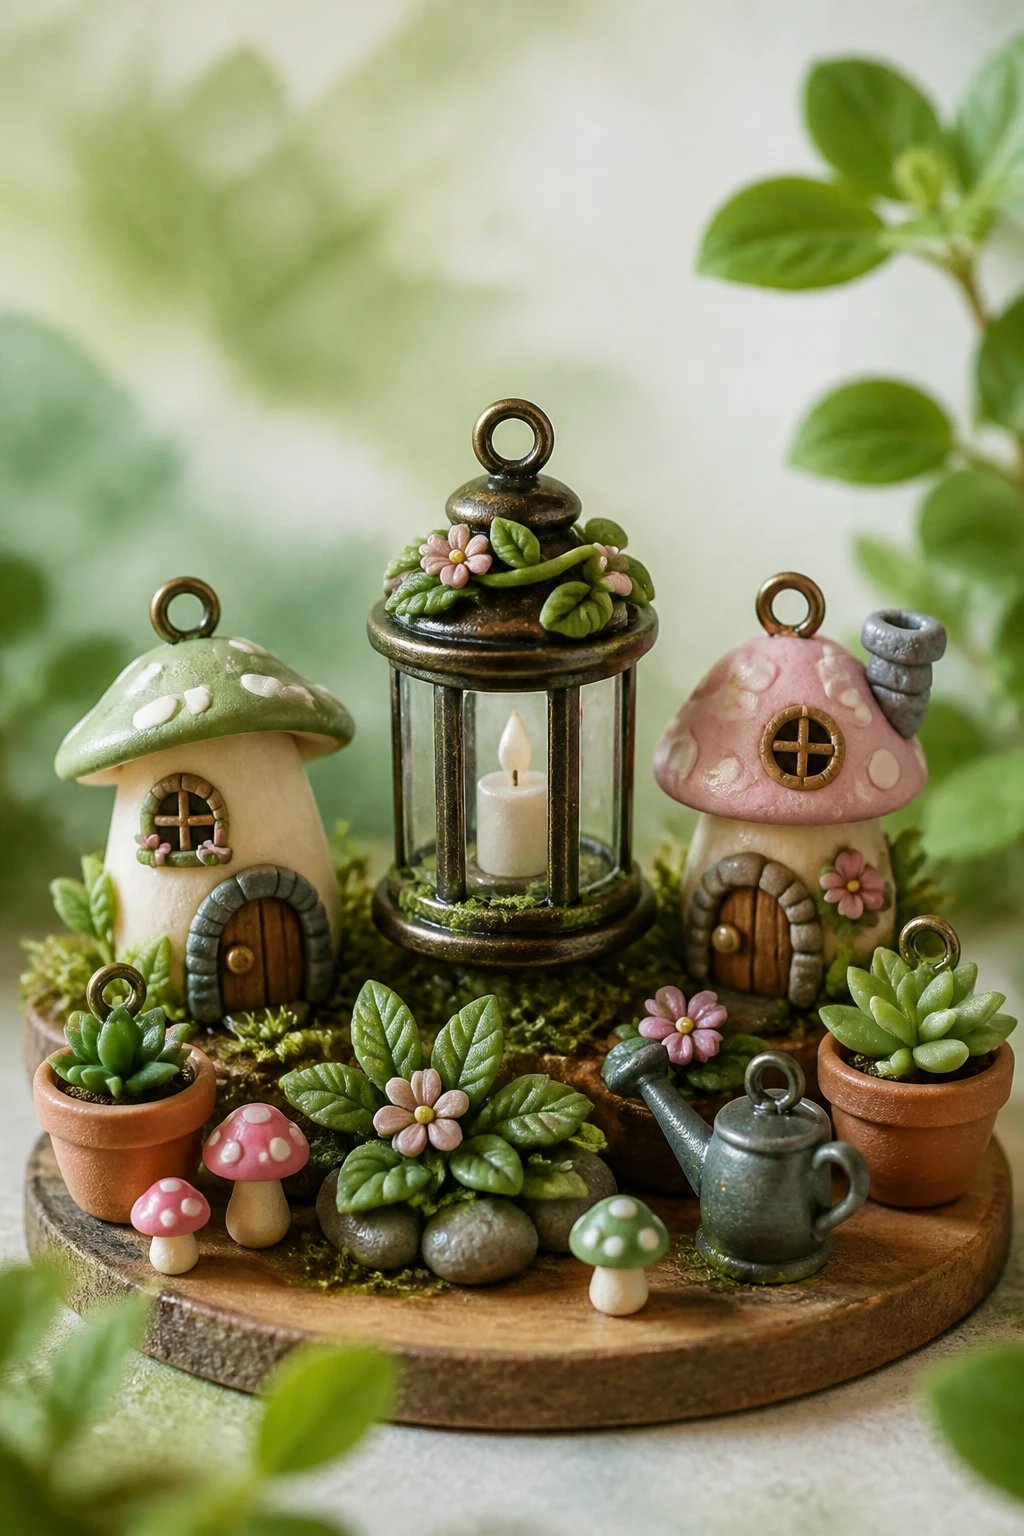
Mini lanterns, mushrooms, and little plants breathe whimsy into your collection and make cute charms or pins.
Use soft greens and earthy tones to evoke a tiny garden mood.
Notes
- Add subtle shadows with dry brushing
- Attach loop holes early so you don’t crack shapes
- Seal for longevity in humidity prone rooms
Bring tiny nature home and into your jewelry box.
16. Abstract Waves for a Modern Look
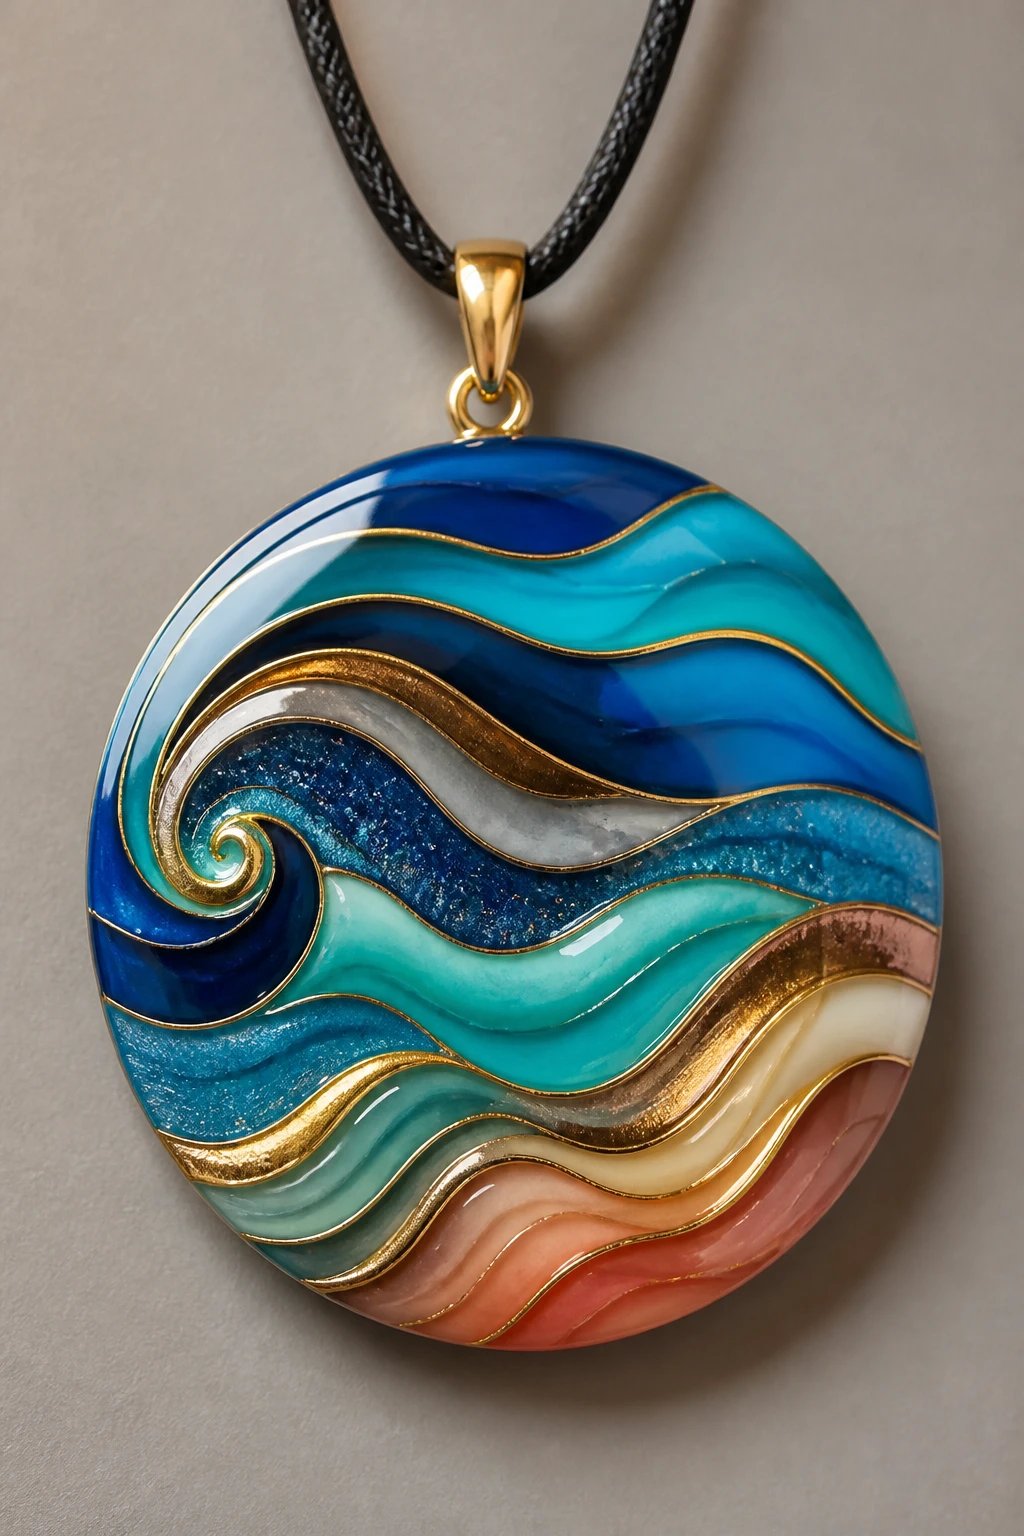
Abstract wave motifs feel dynamic and fresh. Layer different hues to simulate movement like a mini mural.
Keep shapes flowing and avoid rigid lines for a more organic vibe.
Elements
- Sweeping curves
- Thin metallic accents for depth
- Gloss finish to mimic lacquered art
Perfect for pendants, wall hangings, or pins that pop.
17. Pearl and Glow In the Dark Accents

Drop a few pearls or glow in the dark elements into your pieces for an extra wow factor at night.
Balance glow fibers with solid colors to avoid overwhelming the design.
Tips
- Test glow durability under light before sealing
- Use translucent layers to keep glow subtle
- Pair with simple shapes to let the glow shine
Even in daylight these pieces feel premium and unique.
18. Everyday Trinket Sets That Spark Joy
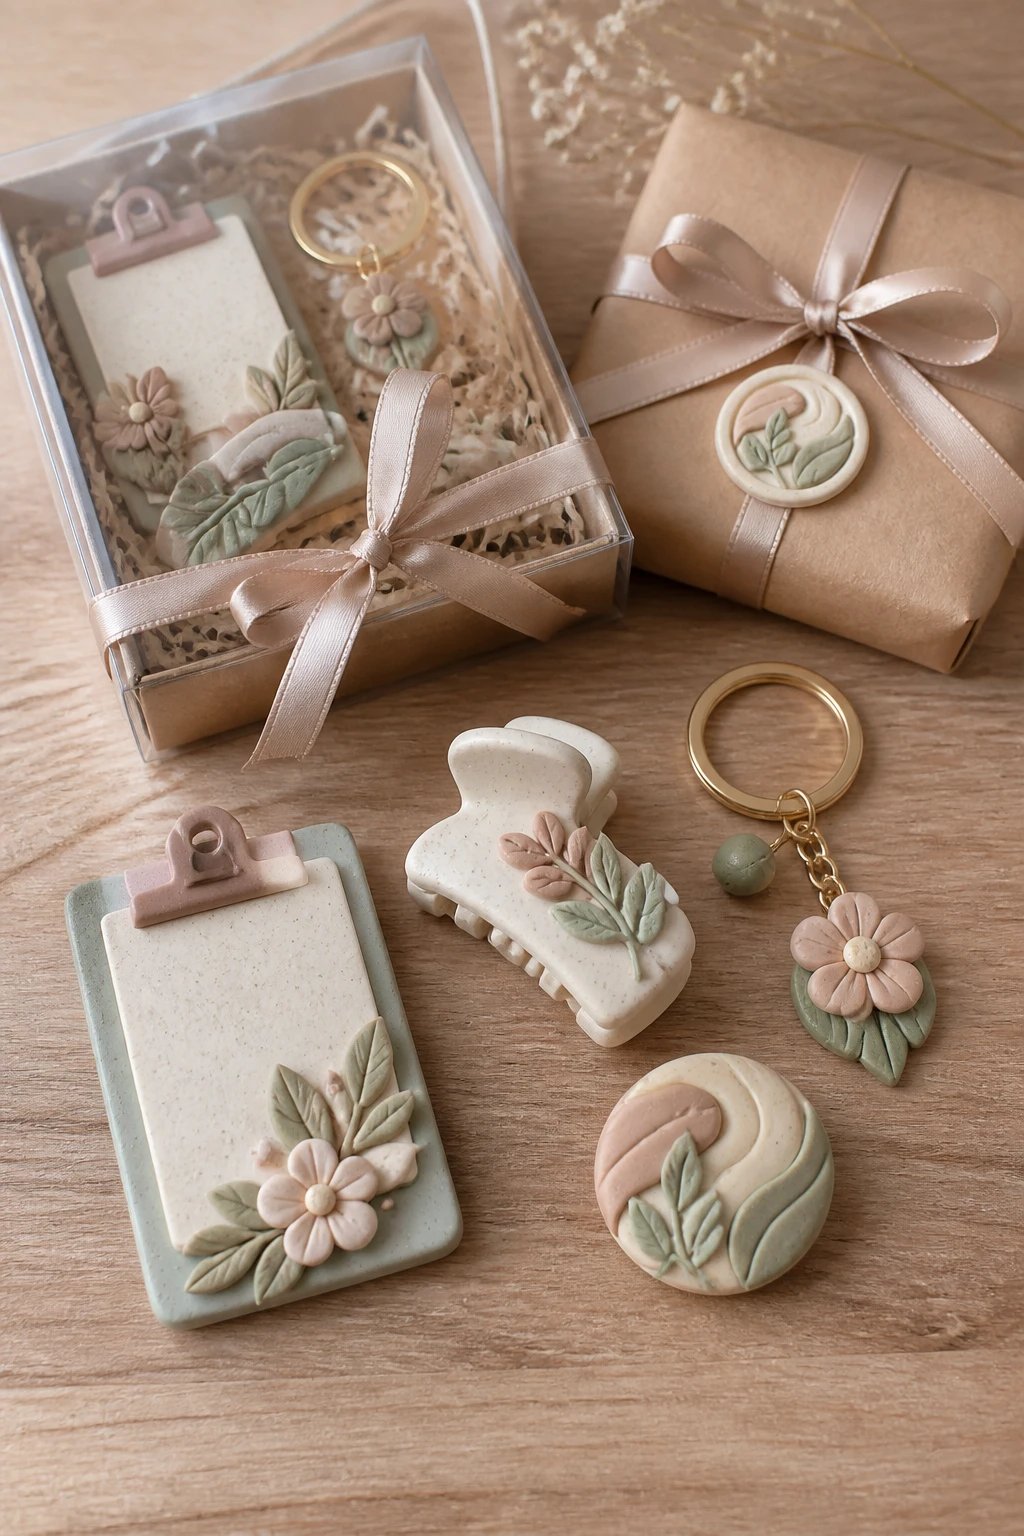
A coordinated set of small items can feel like a curated collection. Think mini clipboards, clips, and tiny keychains.
Use a consistent palette and finish to tie the set together.
What to Include
- 3 to 5 items in varying shapes
- Coordinating packaging ideas for gifting
- Clear sealant for durability
These make fantastic gifts or table decor that shows your personality.
19. Customizable Cane-Work for Endless Possibilities
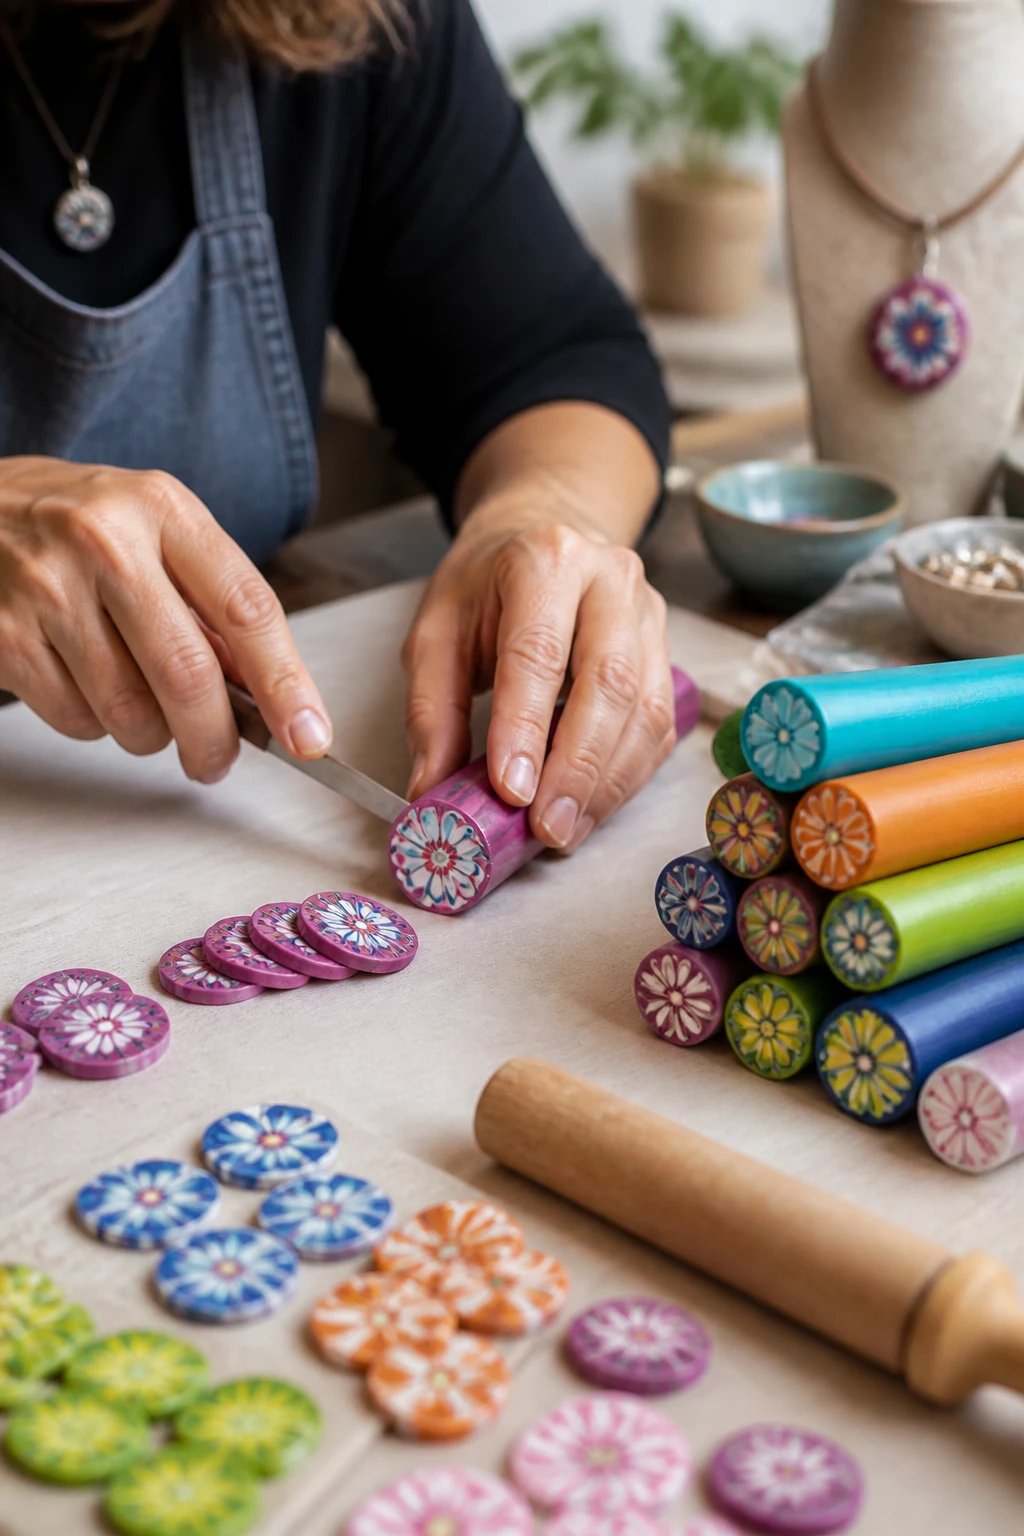
Cane work lets you create repeating patterns with tons of variety. This is the technique that keeps giving long after you start.
Stick to simple canes at first, then gradually layer more complex ones as you gain confidence.
Small Guide
- Plan a color story before you roll out cans
- Slice and blend for balanced stripes
- Slice into thin wafers to cover bowls, pendants, or charms
Once you master basic caning, the options are endless for jewelry, decor, and gifts.
Now that you’ve got a toolbox of ideas, what are you most excited to try first? Grab your clay, roll out a few sheets, and start creating today — the world needs your unique polymer clay magic.
